
The Wyze
Sunday, 30/11/2025
Guide to Backdating Payments for a Property
Step 1. Access the Landlords Tab 0:00
- Navigate to the Landlords tab on the left-hand side.
- Your landlord and property should already be added (follow the other videos for the how to guide on those).
- Select your desired landlord and property.
Step 2. Navigate to the Contracts Tab 0:29
- Select ‘New Contract +’ on the right-hand side of the landlord page.
- Infill the information.
- It is very important that your Wyze contract dates are the same as your paper contract dates. It is also crucial that your payment term is correct (advance, arrears).
- You may have had this property for a few years but it is advised to backdate 3 months.
- Select save.
- Select the green button ‘Landlord Accepted’ to officially begin the Wyze contract.
Step 3. Add your tenancy contract 2:20
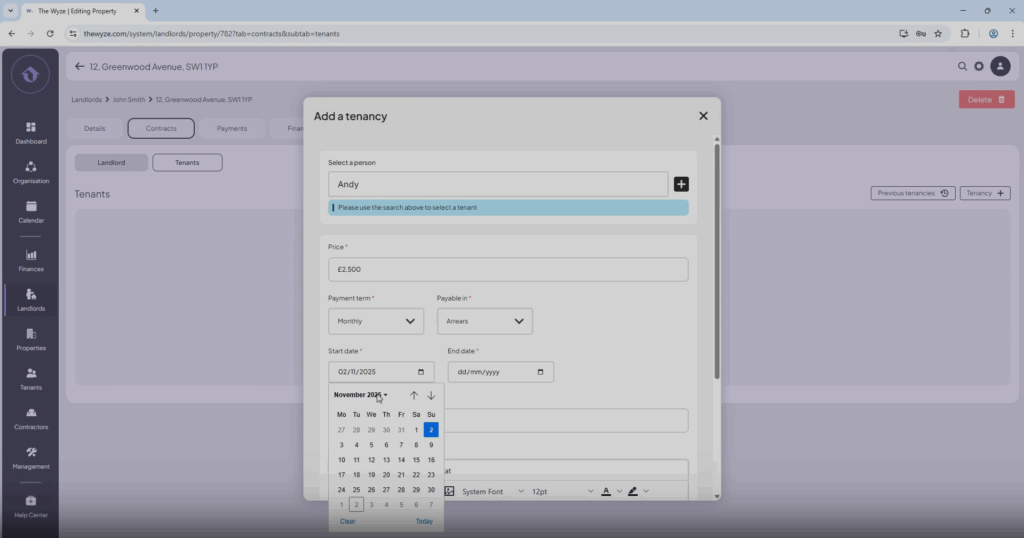
- Select the tenants section in the contracts add.
- Select ‘Tenancy +’ on the right-hand side.
- Infill the details as needed (either a private tenant or council).
- Make sure all dates are correct to your paper contracts.
- Select save.
Step 4. Add Maintenance Jobs 3:10
- You must do this before backdating any rent payments especially if there are any deductions.
- Go to the Management tab.
- Select Add Job and input maintenance details.
- Pay your contractor on Wyze with the correct backdated payment dates (make sure to check your bank statements or other relevant documents).
- You will now receipt the payment by deducting it from your landlords rent.
- Select Receipt Payment and deduct from the landlord’s first month’s rent.
- You must ensure that you have deducted the charge from the correct month, always check your records.
Step 5. Start Backdating Rent Paid to Landlord 5:01
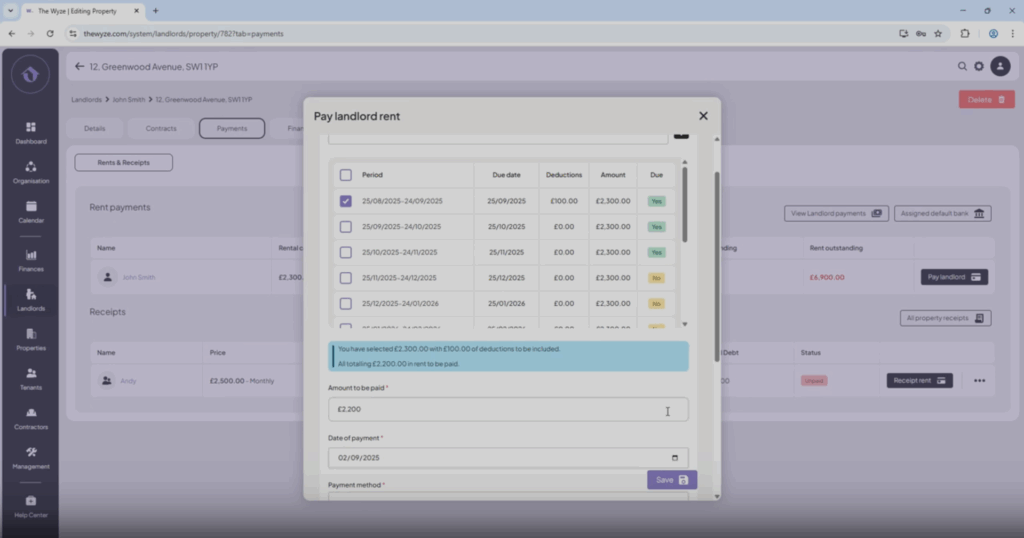
- Go to Payments and check outstanding rent.
- Assign the landlord’s bank and select Pay Landlord.
- Pay month by month, ensuring to check payment dates.
- Rent outstanding should change to the correct amount.
Step 6. Receipt Tenant Rent Payments 7:00
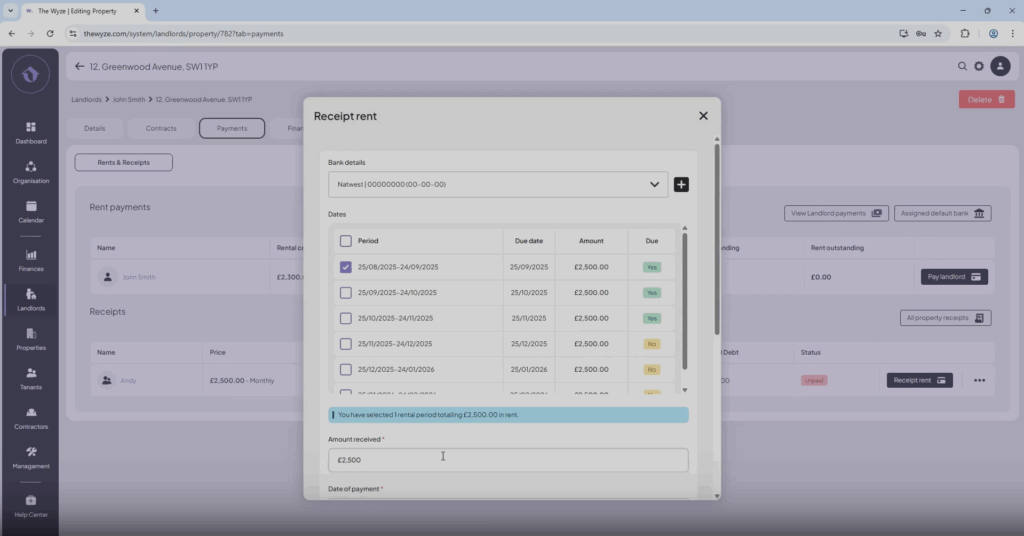
- Go to Receipt Rent and input tenant payment details.
- Make sure you check your bank statements to ensure all payment dates are accurate and true.
- If your tenant pays their rent in two-parts you are also able to input the information as such.
- Rent outstanding should change to the correct amount.
Step 6. View Payment Records 8:33
- Select View Landlord Payments to review all transactions.
Step 7. View Tenant Payment History 9:06
- Select ‘all property receipts’ to view tenant payment history.
- If errors occur, use the delete function to re-enter and correct payment details.